My friend had looked around the Internet and thought the Pololu 3pi robot would be a good starting point, particularly with the mBed expansion board added. I had looked very carefully at the 3pi when evaluating a starting setup for my son and ended up choosing a different system, although the mBed expansion wasn't available then. We ended up purchasing the 4WD Rover kit from DFRobot and I recommended a similar setup to my friend.
When I did my earlier evaluation (in late 2010) I read fairly widely on the internet, browsed the ads in Robot magazine and considered a few options. My shortlist ended up being:
- Pololu 3pi Robot.
- An Arduino, a Motor-Shield, and a chassis possibly built from Tamiya parts.
- One of the DFRobot kits using a Romeo controller.
I'll provide a very quick summary of both platforms and some other options together with a listing of the benefits and disbenefits of each option and why I recommended the DFRobot solution. I have to preface this whole discussion with the note that there are a HUGE number of getting started robotics platforms out there, and more are being added all the time. What is best for one person won't be best for another and will depend greatly on what you are thinking of doing with it and what your own skills are.
There are some glaring omissions from this "review", including the very popular Lego NXT system, and the Vex robotics system. These are highly capable "retail" systems and either would provide a good start into robotics. These systems are both expensive, particularly when shipping to New Zealand is considered, and both have limitations on expansion. Both come with pre-made curricula and have great support so would be good options for schools.
Onto the descriptions ...
Pololu 3pi.
 |
| The Pololu 3pi |
The Pololu 3pi robot is a complete, high-performance mobile platform featuring two micro metal gearmotors, five reflectance sensors, an 8×2 character LCD, a buzzer, and three user pushbuttons, all connected to a C-programmable ATmega328 microcontroller. Capable of speeds exceeding 3 feet per second, 3pi is a great first robot for ambitious beginners and a perfect second robot for those looking to move up from non-programmable or slower beginner robots.
As the robot is controlled by an ATmega328, the same microcontroller used on the very popular open-source Arduino boards, it is apparently possible to use the Arduino IDE and libraries with the Pololu. Additional prototpying circuit-boards are available to add extra decks for expansion.
Pololu have recently added the mBed expansion option for the 3pi platform. With this expansion board the robot becomes the m3pi. This expansion board allows an mBed development board to be used as the primary controller with the ATmega328 acting as a slave controller via serial communications. Pololu offer the ARM mbed NXP LPC1768 Development Board which is a very capable microcontroller. Pololu say ...
Based on the powerful NXP LPC1768 Cortex-M3 processor, which runs at 96 MHz and offers 512 KB flash and 64 KB SRAM, the 32-bit mbed can handily outperform popular 8-bit prototyping platforms like the Arduino and Basic Stamp. The mbed also offers peripherals not typically found on lower-performance prototyping boards, such as ethernet, USB OTG, a 12-bit ADC, a 10-bit DAC for a true analog voltage output, in addition to more common interfaces like serial (UART), SPI, I2C, and CAN.
The expansion board also makes it easy to add wireless communications for the m3pi robot. Get the full details at Pololu
Arduino-based
Anyone unfamiliar with the Arduino platform owes it to themselves to investigate this microcontroller phenomenom starting at www.arduino.cc.
In a nutshell this is an open-hardware development board using the capable AVR series of microcontrollers married with easy-to-learn free IDE programming software. Due to the open-hardware nature a wide range of derivative and clone boards are available at reasonable prices. A wide range of expansion boards (known as Shields) are available. Despite a number of detractors (usually hard-core programmer-types) the platform has gained huge success with artists, tinkerers and hobbyists.
The huge range of freely available software examples, forums, books, and compatible expansion boards and accessories make this an attractive platform for learning about microcontrollers - a key component of hobby robotics.
An Arduino board or clone would need to be married with a motor-driver board (a number of Motor Shield options are available), a few sensors, and a simple chassis with motors and wheels. Again a wide variety of options exist, with this chassis from DFRobot being but one example.
Parts Required:
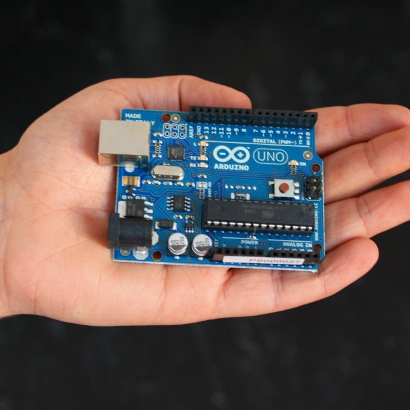
An Arduino or Clone. Say the Arduino UNO, or TwentyEleven or similar.
A Motor Shield. Say the ArduMoto or similar - enough to power most small motors but check the motor stall current is within limits.
A chassis with motors and wheels or tracks. Either make your own or buy one of many kits.
For those of you reading in New Zealand all of the above is available from MindKits. Those elsewhere may prefer to buy from elsewhere such as Pololu, SparkFun, DFRobot or a huge range of on-line robotics hobby stores.
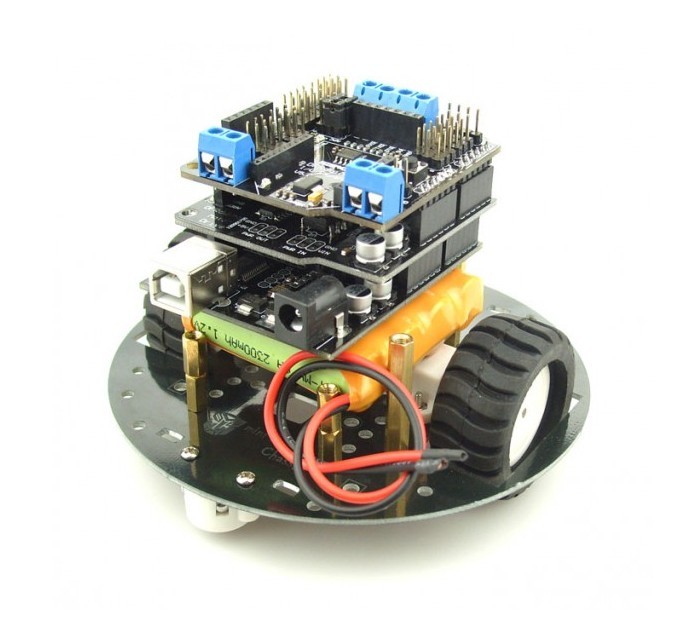 |
| A DFRobot miniQ chassis with an Arduino and Motor Shield |
DFRobot Rover
DFRobot offer a number of small robot solutions including chassis ideal for using with an Arduino, including chassis with tank-tracks, 2 wheels, or 4 wheels. You can see a review of the tracked robot at Robot Magazine.
In addition they offer the Romeo robot controller. This is a circuit board with an Arduino clone in the middle, fully compatible with the Arduino software and expansion shields. Also included on the board are built-in motor drivers for two DC motors, some push buttons, and a range of "headers" to make connecting sensors easy, and a socket for a wireless communication board.
 |
| DFRobot 4WD Chassis with Romeo |
After some use we ended up needing two replacement motors, and this is my only negative comment about the DFRobot system. The motors have plastic shafts and plastic gears - clearly why they are able to be priced so low. After a few weeks of use we had one motor with a broken gear tooth and another with a broken shaft. The motors are cheap to replace but not particularly durable. I'm not sure that the same problems would have occurred with a 2WD robot as the 4WD skid-steer system places additional loads on the motors when turning the robot and the wheels are near the corners where they are more vunerable to collisions.

Now on to the comparison and evaluation ...
I ended up going with the DFRobot Romeo for a number of reasons. At the time the mBed expansion wasn't available, and I'll summarise the impact that has at the end.
1. The 3pi has most Input/ Output (IO) ports tied to on-board peripherals whereas on the romeo you can remove jumpers and free up all the pins. When working with most microcontrollers the first thing you run out of is IO pins. The 3pi has the option of disabling some on-board functions which gives the option of freeing up to 3 digital IO pins and up to 3 free analog-to-digital conversion (ADC) pins.
2. 3pi has no wheel encoders and no apparent way to add them as there are no free interrupt-able IO pins spare. This is not a major for line-following or maze-solving but for other tasks having encoders might be really useful.
3. From what I can tell from the available information there is no end-user access to I2C/TWI or SPI on the 3pi. (These are systems that allow communication between various integrated circuits). On the arduino/Romeo you can add on peripherals using these busses which saves on input pins.
4. If you wanted to upgrade the hardware (bigger platform, bigger motors, servos, an arm) it was going to be difficult with the 3pi, easy with the arduino as we have already proved by abandoning our original 4-wheel chassis for a home-built 2-wheel one. We could build a bigger or smaller robot and keep the controller (and code).
5. If you wanted to upgrade the microcontroller you could keep the chassis, motors etc. For example a Parallax Propeller board or an mBed board would give more power.
6. I am comfortable selecting various components (motors, motor driver boards, sensors) etc and putting them together so an Arduino-based solution is a viable option for me, but in the end the Romeo and the DFRobot system with their sensors and sensor cables make the selection and configuration easy. The 3pi is all done for you.
7. I am comfortable doing basic DIY chassis-building. There are a variety of options including plastic sheet, MDF, aluminium sheet, LEGO, meccano (erector set) or whatever.
8. I am already using the Arduino on other projects so am familiar with it.
For me a big thing was that with the Romeo you essentially get a standard Arduinot which allows the controller board to be used for a whole lot of non-robot applications and get into the other dimensions of microcontrollers and electronics, and the Arduino community is truly enormous. Have a look at http://tronixstuff.wordpress.com/tutorials/ and http://www.arduino.cc.
Anyway, that was my earlier evaluation before the mbed expansion was available. The 3pi is a very good beginner-intermediate robot platform that would require less integration work. At it's core it has the same controller chip as the arduino - the main difference is that it has a pre-built chassis and integrated peripherals - that is both a good thing (easier to use) and a bad one (ties up IO lines). With the 3pi there are few additional lines available for adding extra sensors, but with the Romeo a complete re-configuration for a different task is possible.
m3pi Option
The mBed expansion option to convert the 3pi to the m3pi addresses many of the potential shortcomings with the 3pi - providing access to I2C and SPI busses, access to more IO pins, not to mention more power - but this power comes at significant extra cost.
The Romeo/ Arduino path also allows for expansion via several paths:
- swapping the basic Arduino for a more powerful one (eg Arduino Mega) but this would require a replacement motor driver.
- Swapping out the Arduino controller for a different more powerful controller such as a Propellor or mBed.
- adding on a second controller in a similar manner to the mBed expansion, either via a custom solution, perhaps built on a prototyping shield. Another option is the Propelleruino which has a Parallax Propeller chip on an expansion shield.
If you decide to go with the 3pi I'm sure it will work well and be a good solution, particularly with an mbed available to expand into; but I have found the DFRobot Romeo to be an excellent (and very flexible) platform for beginning roboteers.